Now you too can understand my *pain*!
I will show you how how to make a quick-and-easy, basic CIS patch using xEdit. In this example, we will be using CISCore to inject mod-content from the Pero Pero robes collection into Skyrim. Please note this tutorial is intended for non-enchanted items. Enchanted gear tends to be directly injected into Skyrim’s vanilla Leveled Lists (LVLI), as opposed to CISCore’s. This tutorial will assume that you have little to no experience with xEdit and Leveled Lists (LVLI).
Note – To expand any of the images, simply right-click and “Open image in new tab”.
Let’s begin!
- First, boot up xEdit. From the plugins menu, select ‘CISCore.esp” and the mod you want to create a CIS patch for. Here’s a helpful tip; by right clicking on the plugins menu, you can click “Select None” to uncheck all checked plugins. This is particularly useful when you have a large load order.
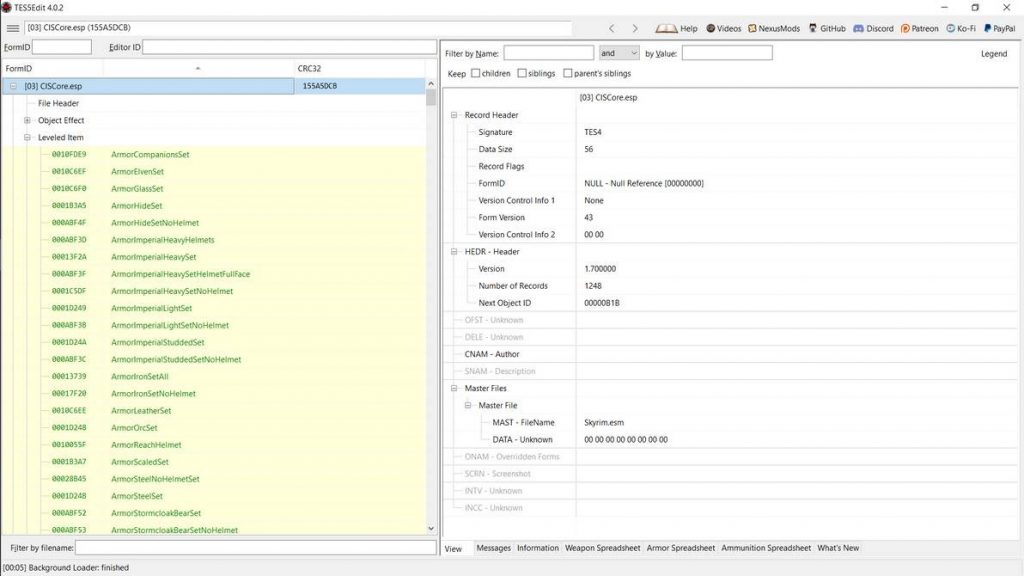
- Click the small box (with the “+”) next to CISCore.esp. Then, click the same box next to “Leveled Item”. A drop down menu of all item-related Leveled Lists (LVLI) will appear. I recommend sorting this menu by Editor IDs, by clicking the space between “FormID” and “CRC32” towards the top of the interface. Depending on what you have selected, you may or may not see the words “EditorID”. In any case, clicking the appropriate area will have the same effect. All CIS-leveled lists are carefully named, and designed to be easily sorted.
Color Coding
You will see both Skyrim’s vanilla Leveled Lists and CISCore’s. CISCore overrides select vanilla Leveled Lists, which should be highlighted yellow. This indicates that there are two copies of the same Leveled Lists (LVLI), and they have different data. You may also see Leveled Lists which are highlighted green. This also means that there are two copies of the same Leveled Lists, however both copies are exactly the same. These are bad modding practice, and you should avoid creating these whenever possible. Non-highlighted Leveled Lists (or white) indicate they are not being overridden by another mod.
Naming Conventions
CISCore and Skyrim’s Leveled Lists are named deliberately. In this example, we will only be using CISCore’s Leveled Lists. All of CISCore’s Leveled Lists start with one of two prefixes, CIS or CISNPC. Entries with the CISNPC prefix are only used by a specific CIS mod called CISNPCs. If you don’t plan on using this mod, you will not need to worry about editing CISNPC Leveled Lists. If you plan in distributing your CIS patch, I highly recommend that you use both “CIS” and “CISNPC” Leveled Lists. For every “CIS” Leveled List, there is exact copy with the prefix “CISNPC”.
For this CIS patch, will be only be using sublists. The word “sublist” is an identifier used to indicate that a Leveled List is intended for use inside another Leveled List. Sublists don’t typically contain leveled items. Each CIS sublist represents an item in-game. For example, “CISSublistArmorFurBoots” stands for “Fur Boots”. For every pair of Fur Boots that spawns in-game, CISCore checks for modifications to CISSublistArmorFurBoots. If another mod adds an entry to CISSublistArmorFurBoots (for example, another CIS patch), CISCore will randomly choose between that entry and the original (vanilla) entry.
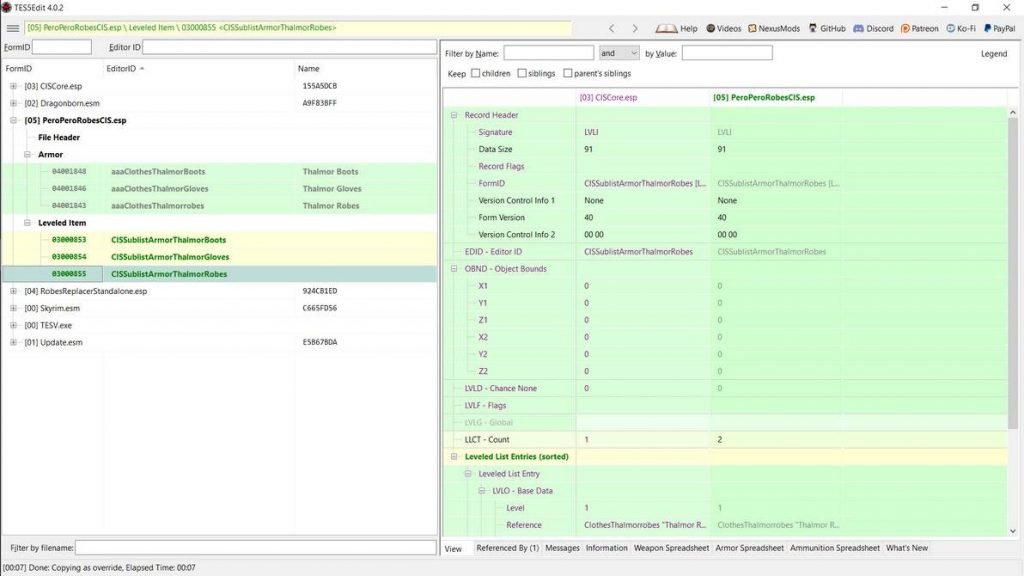
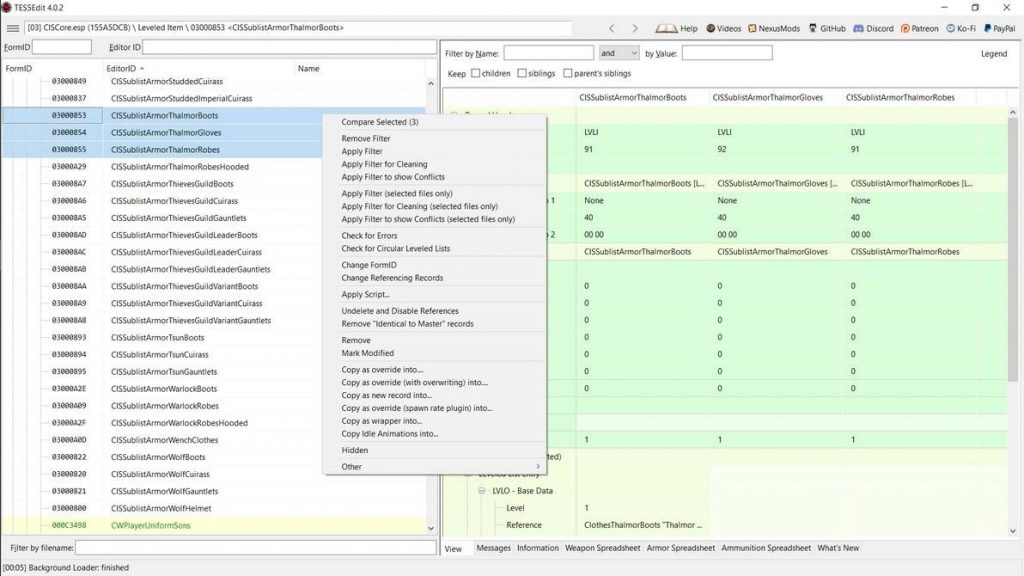
(3) In this example, we will be creating a CIS patch for Thalmor clothes (from the Pero Pero Robes collection). With that in mind, scroll down CISCore’s Leveled Items (LVLI) until you find the appropriate entries; I have selected CISSublistArmorThalmorBoots, CISSublistArmorThalmorGloves, and CISSublistArmorThalmorRobes. Hold down the CTRL key to select multiple entries at once. Then, right click any selected entry. Click “Copy as override into. . .” (See Naming Conventions, above)
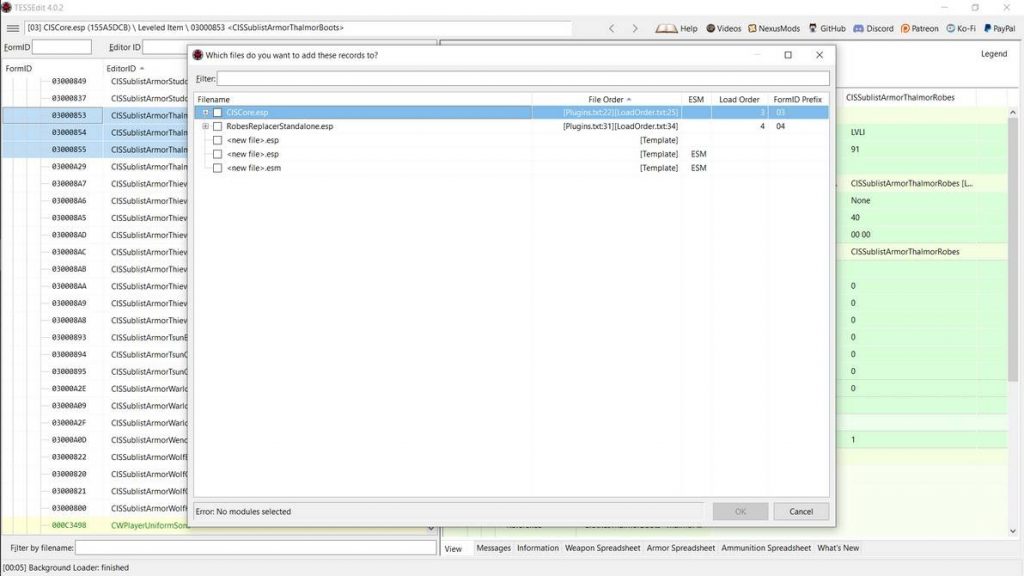
(4) You will then be asked which files do you want to add these records to? Check off <new file>.esp and then click “OK” on the bottom right. Give your CIS patch a name and click “OK” again. I will name this CIS patch “PeroPeroRobesCIS”. As a general naming convention, CIS patches use no spaces (or symbols), and always end in “CIS”. The selected records will turn green, indicating they are (now) being overwritten by another loaded mod. (See Color Coding, above)
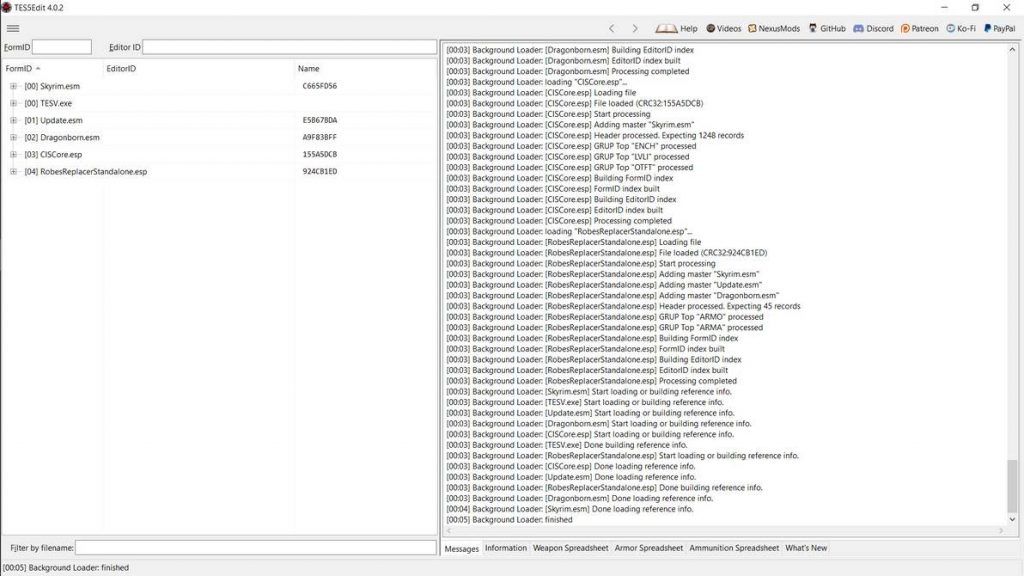
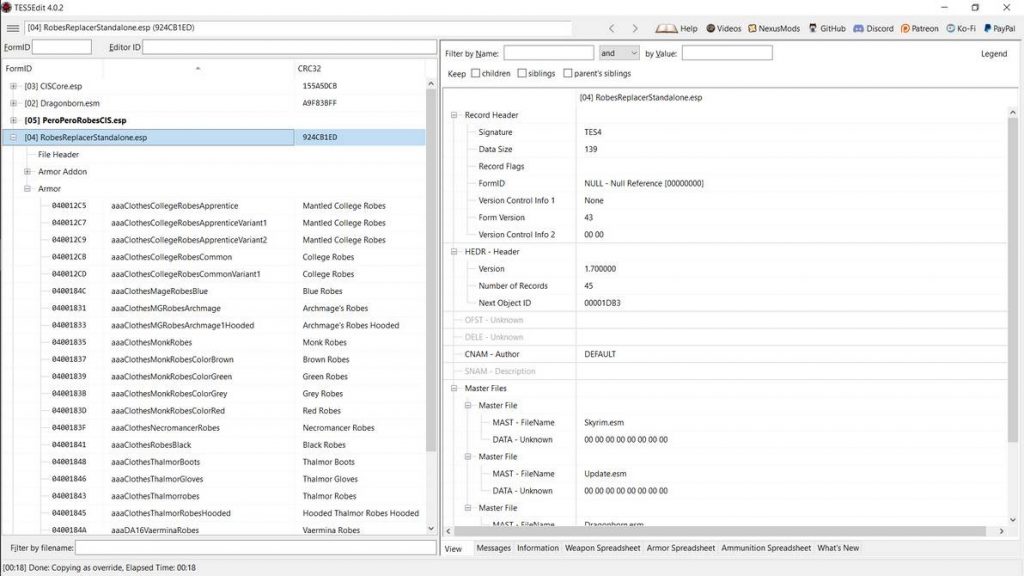
(5) Click the small box (now with a “-“) next to CISCore.esp. This will collapse all entries from CISCore, tidying up your interface. Now click the small box (with the “+”) next to the mod you want to create a CIS patch for. In this case, I am using RobesReplacerStandalone.esp.
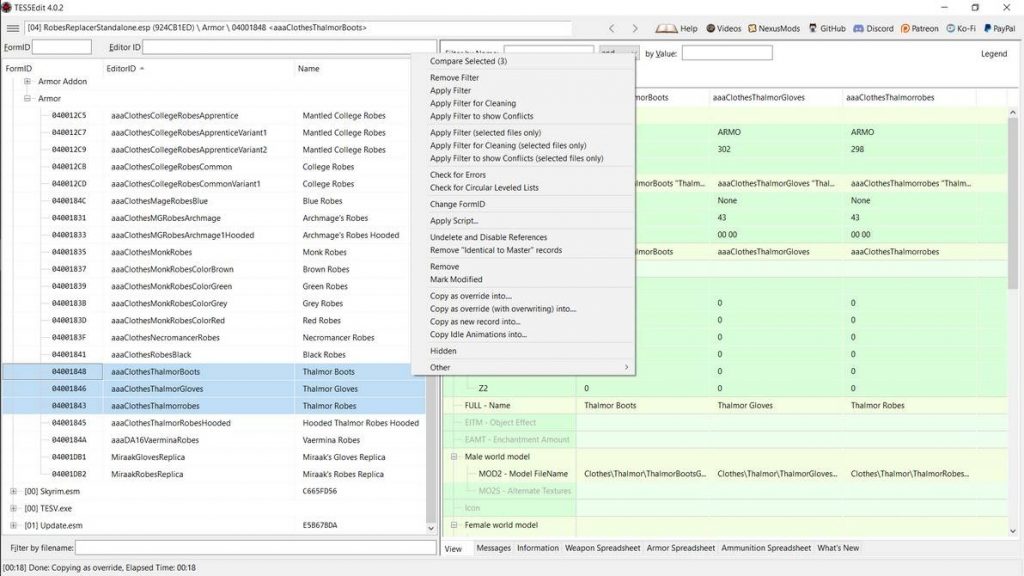
(6) This step is technically optional, but useful when dealing with mods with 100s or 1000s of entries. You’ll see why later, but this step will automatically add the appropriate master(s) to your CIS patch, which is a crucial step. Scroll down until you find the items you want to add to your CIS patch. In this example, I am adding Thalmor clothes. Follow the same steps you did for CISCore’s sublists. Hold down the CTRL key to select multiple entries. Then right click on any selected entry, and click “Copy as override into. . .”
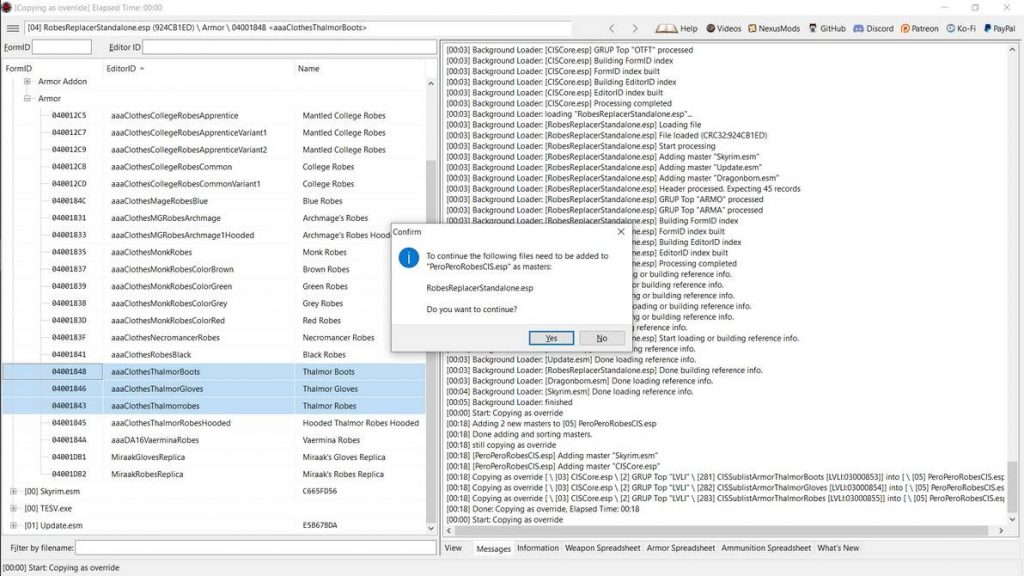
(7) Instead of checking-off “<new file>.esp”, check-off the CIS patch you made earlier. In this example, I will be checking off “PeroPeroRobesCIS.esp”.
(8) You will then be asked if you’d like to add one or more new masters to the CIS patch you created. Click “OK”.

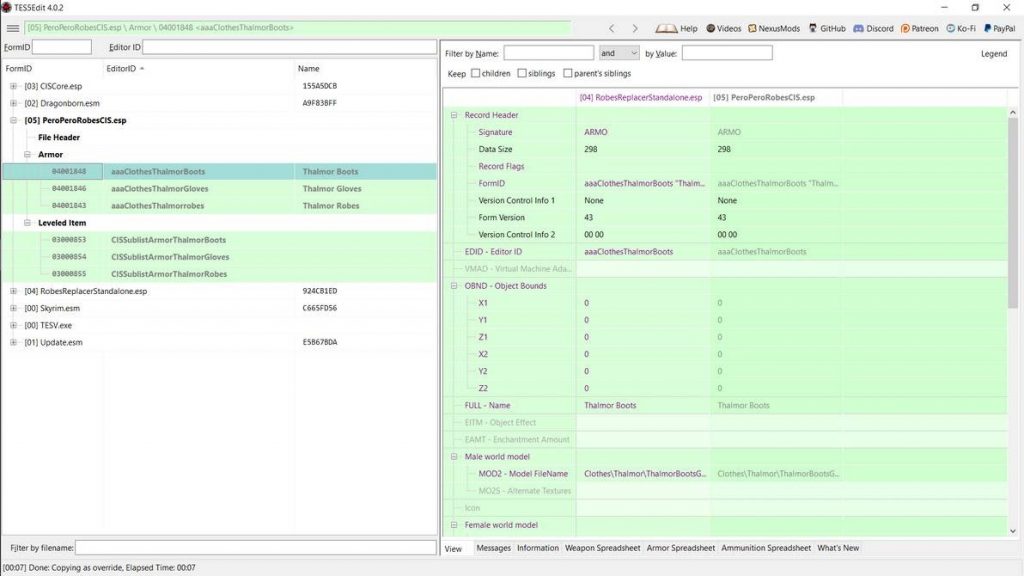
(9) Click the box (now with a “-“) next to the mod you are creating a CIS patch for. Then click the box (with a “+”) next to your CIS patch. From there, do the same for “Armor” and “Leveled Item”. Before you can add items from the mod being patched to your CIS patch, you will need to collect FormIDs. I suggest keeping a word processing program open during this step. FormIDs are unique addresses assigned to everything.
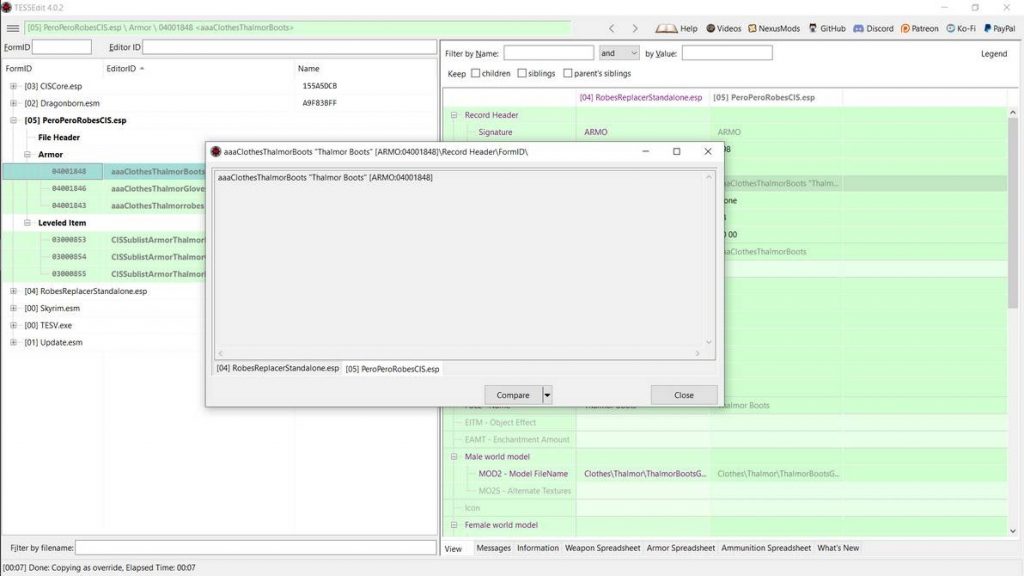
(10) To obtain an item’s FormID, click on the item on the left-hand interface. Then double-click on the “FormID” listed in the right interface. Copy and paste this code into a word processing program. If need be, take a note of which item that FormID corresponds to. Exit the pop-up window, and then rinse and repeat for all items you would like to add to your CIS patch.
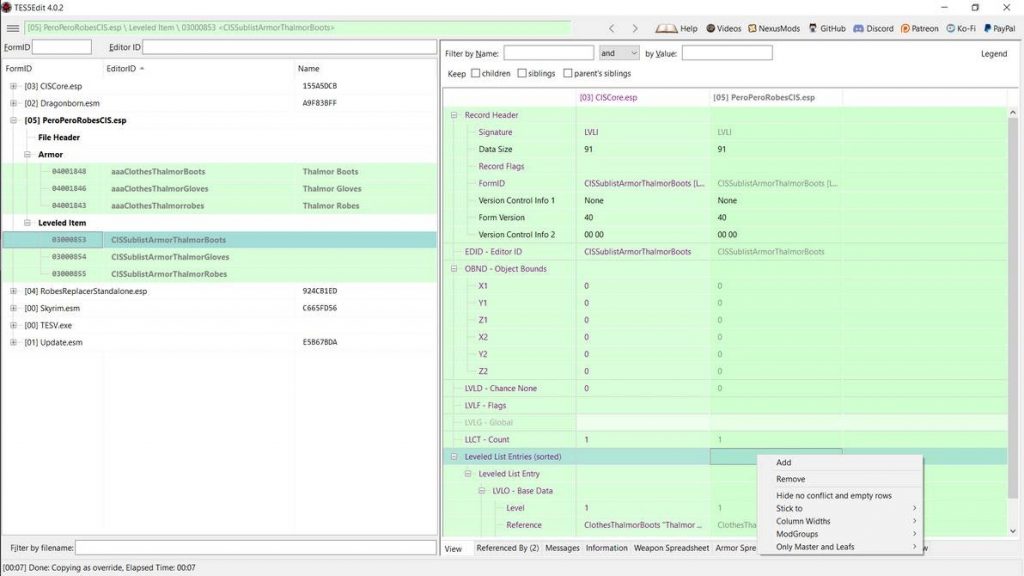
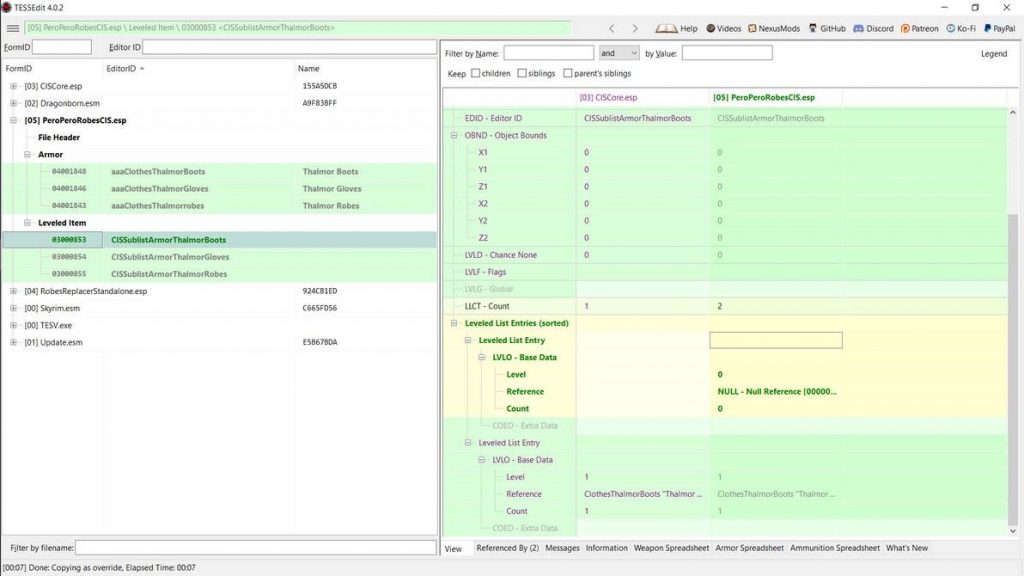
11) Now we will add items to the CISCore Leveled Items (LVLI) we copied earlier using the saved FormIDs. Click on a CIS sublist (listed under “Leveled Item”) on the left-hand interface. In this example, I will begin adding a pair of Thalmor Boots to the appropriate Leveled Item (LVLI), CISSublistArmorThalmorBoots. Right-click “Leveled List Entry” on the right-hand interface, then click “Add”. The Leveled List (LVLI) entry in the left-hand interface will turn yellow, indicating we now have two different copies of the same Leveled Item (LVLI). (See Color Coding, above)
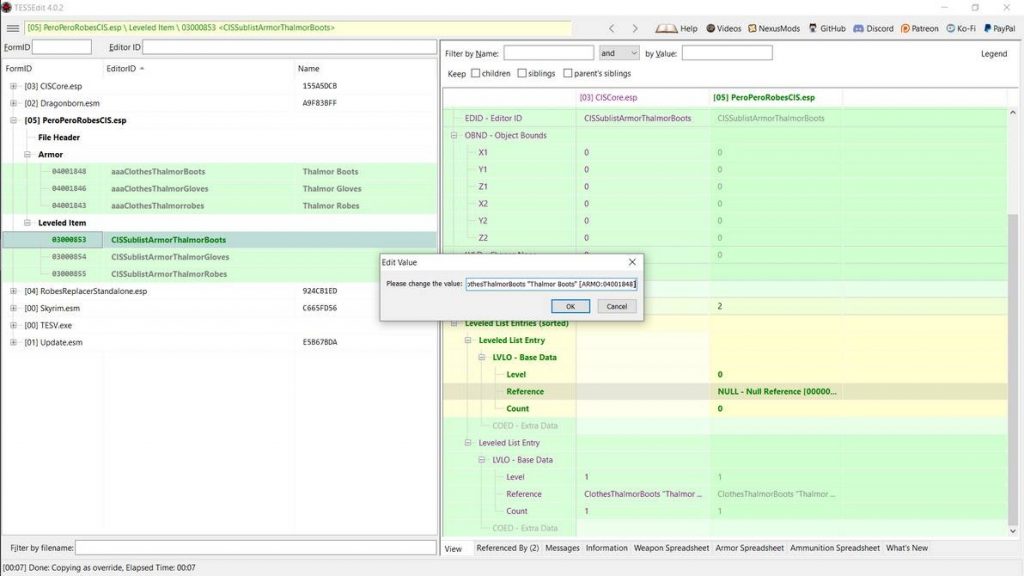
(12) Right-click “Reference” (on the right-hand interface, and currently set to “NULL”) inside of the Leveled List Entry you have just created. A prompt will pop-up.
13) Copy/paste the appropriate FormID into the prompt. Because I am editing CISSublistArmorThalmorBoots, I will make sure I am copy and pasting the FormID of the Thalmor Boots from the Pero Pero mod I’m patching. Then click “OK”.
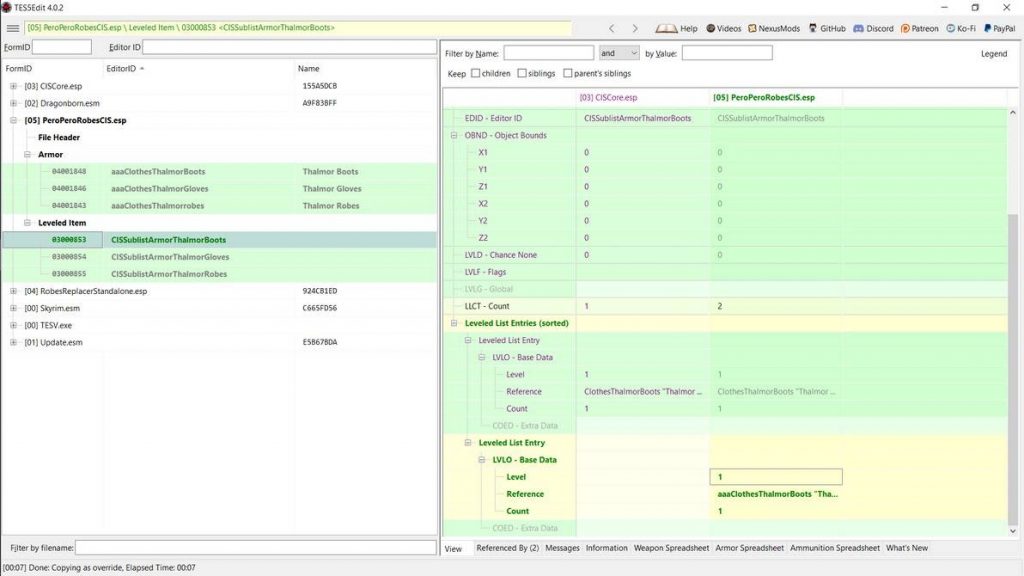
(14) Right-click (or double-click) “Level” and “Count” and set them to “1”. “Level” tells Skyrim what level the player has to be before the item in question spawns, and “Count” tells Skyrim how many of those items spawn at a time.
(15) Rinse and repeat steps “11” through “14” for however many items you are adding to CISCore’s Leveled Lists (LVLI). In this example, I will repeat steps “11” through “14” for Thalmor Gloves and Thalmor Robes.
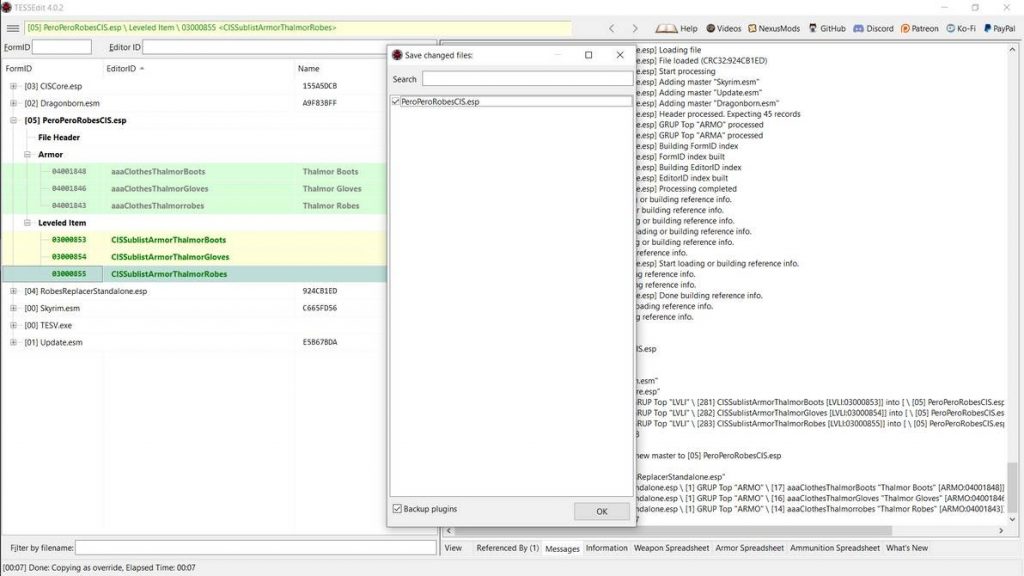
(16) Afterwards, hold down the CTRL and “S” key to bring up the “Save changed files” prompt. Make sure your CIS patch is checked off, and click “OK”. Alternatively, you can exit the apppliation and this menu should automatically appear. But it is good practice to save often, and I prefer the (much safer) method of the “CTRL+S” keys. After exiting the application, your CIS patch should now be ready for use! Make sure you merge this new patch into a merged .esp, or use Wyre Bash to create a Bashed Patch.